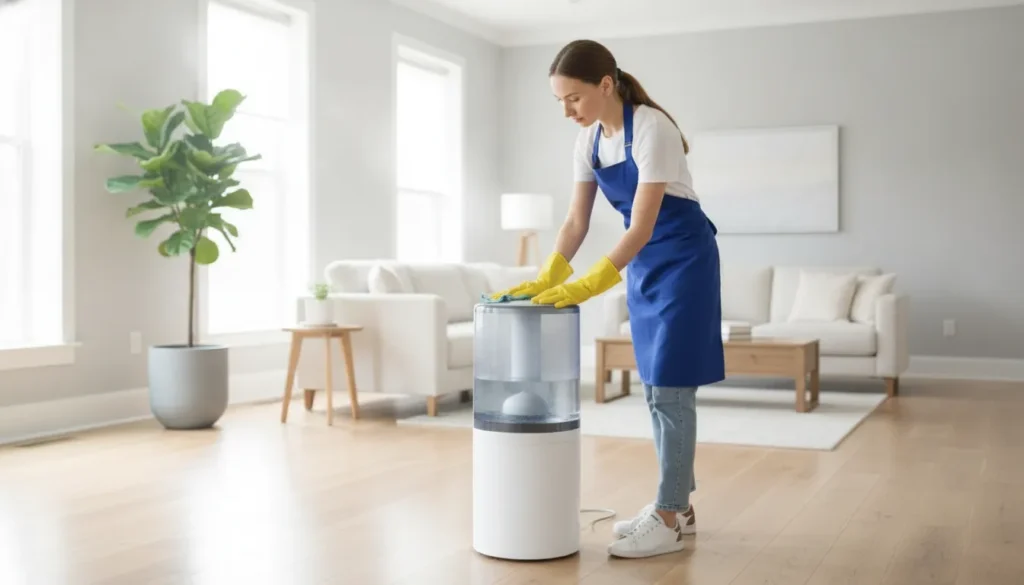
Mineral buildup and standing water can make a humidifier harder to maintain. A careful cleaning routine keeps the task manageable. Before starting, identify the model and keep its manual nearby. Materials, filters, and approved cleaning methods can differ.
To learn how to clean a humidifier safely, unplug it first and follow the manual. Separate only the removable parts it allows you to take out. Remove buildup using the approved method. Rinse each part as directed and let everything dry fully. Reassemble the unit only when all parts are dry and it is safe to operate.
With those precautions in place, you can work through the unit in a logical order, checking each part instead of rushing from the tank to reassembly.
Request a cleaning quote from Clear Choice Home Cleaning Services
How to Clean a Humidifier Safely, Step by Step
A careful process matters because humidifiers combine standing water with electrical components. Identify the model before reaching for a cleaner. Set aside enough time to rinse and dry every removable part. This guide provides a practical framework for how to clean a humidifier. The owner’s manual always controls when it gives different directions.
- Unplug the humidifier and empty it. Turn the unit off, disconnect the plug from the outlet, and carry it to a sink if needed. Pour out water from the tank, base, tray, and any other reservoir. Do not begin disassembly while the appliance is connected to power.
- Read the model manual before separating parts. Check which components may be removed and how they should be cleaned. Look for instructions covering the tank, cap, base, tray, wick or filter, approved cleaning products, dishwasher use, and replacement parts. Do not assume two humidifiers made by different brands can be cleaned the same way.
- Separate only the parts the manual identifies as removable. Set the tank, cap, tray, wick, or filter where you can inspect them without losing small seals or valves. Leave the motor housing, controls, cord, and other electrical sections intact. If a part does not release easily, stop rather than forcing it.
- Inspect for mineral buildup and damage. Look for white or chalky deposits around the tank, cap, tray, and base. Also check for cracks, brittle seals, frayed cords, or a wick or filter that looks worn. If the manual provides a cleaning method for scale, follow that method. Do not choose a chemical solely because it worked on another appliance.
- Clean with the manual-approved method. Apply the recommended solution only to the parts and surfaces the instructions permit. Follow the specified dilution, contact time, and scrubbing guidance. A soft cloth or soft brush can help lift residue without scratching, but avoid abrasive tools unless the manufacturer specifically allows them. Never mix cleaning products.
- Rinse removable parts thoroughly. Use the type and amount of water directed by the manual. Remove all remaining cleaner and loosened mineral residue from the tank, cap, tray, and other washable components. Keep water away from the motor housing, controls, plug, and other electrical components. Never immerse the whole unit unless the manufacturer explicitly says it is designed for that use.
- Dry everything completely. Place the cleaned parts on a clean, dry towel and allow water to drain from seams, openings, and recesses. The wick or filter may have separate drying or replacement instructions. Do not operate the humidifier, connect it to power, or close it up for storage while parts are wet.
- Reassemble and test carefully. Refit the cap, tank, tray, wick, or filter exactly as shown in the manual. Confirm that seals sit correctly and that no part is cracked or loose. Once the unit is fully dry, add water as directed, place it on a stable surface, and run a brief test. Stop if you notice leakage, an unusual smell, damaged wiring, or another problem, then consult the manufacturer.
Cleaning removes residue from accessible components, but it does not make damaged parts safe to use. When the manual is missing or unclear, use the manufacturer’s support resources before applying a new product or taking the unit apart further.
What Should You Use to Remove Mineral Buildup?
Mineral buildup can collect in a humidifier tank, basin, mist outlet, or other water-contact area. The right cleaner depends on the unit’s materials and the manufacturer’s instructions. A method that is acceptable for one model may damage another, so check the manual before choosing a product. If you no longer have the printed manual, look for the model number and use the manufacturer’s official care instructions.
Start by unplugging the humidifier and emptying any remaining water. Remove only the parts the instructions identify as removable. If the manual names a specific cleaner or cleaning process, follow that direction rather than substituting a household product. Apply the cleaner only where the instructions allow it, and use a soft cloth or soft brush unless the manufacturer specifies another tool.
| Option | When it may fit | Caution |
|---|---|---|
| Manual-approved cleaner | When the model instructions identify a compatible cleaner for mineral deposits or water-contact parts. | Follow the stated dilution, contact time, surfaces, and rinsing directions. Do not assume approval for every part. |
| White vinegar | Only when the model manual permits vinegar for that humidifier and its materials. | Vinegar is not a universal solution. Do not use it simply because another humidifier’s instructions recommend it. |
| Plain water | For rinsing after an approved cleaning method, or for wiping areas where the manual permits water alone. | Rinsing does not replace mineral-buildup removal when deposits remain. Keep water away from electrical components. |
Do not mix vinegar, bleach, detergent, descaler, or any other cleaning chemicals. Combining products can create dangerous fumes or leave residues that the manual does not permit. Use one approved method at a time, then rinse thoroughly as directed. If you are unsure whether a cleaner has been fully removed, continue rinsing according to the instructions instead of adding another product.
Abrasive powders, scouring pads, blades, and stiff brushes can scratch plastic, coatings, sensors, or other surfaces. Avoid them unless the manufacturer specifically approves the tool. Scratches may make parts harder to clean and can leave areas where residue collects. Gentle, repeated wiping is safer than forceful scraping.
After cleaning, inspect the part for remaining scale, cracks, discoloration, or damage. Rinse approved removable parts, wipe them dry, and let them dry completely before reassembly. Never operate the humidifier while it is wet or while a cleaning solution may remain inside. When the manual does not clearly address a material, cleaner, or damaged component, pause and ask the manufacturer before continuing.
How Do You Clean a Humidifier With Mold or Odor?
Visible mold, slime, or a persistent odor is a reason to stop using the humidifier until you understand the source and the manufacturer’s cleaning instructions. Turn the unit off, unplug it, and move it away from children, pets, food preparation areas, and other items that could be exposed to drips or residue. Do not carry it while it is operating or attempt to clean it while connected to power.
Separate the parts before deciding what can be cleaned
Empty the tank and isolate every removable component that the manual identifies as washable. Keep the tank, cap, tray, wick, filter, and other pieces separate so you can inspect each one. Look for cracks, soft or degraded material, blocked openings, or residue that remains after the approved cleaning process. Do not assume that every part can be soaked. Some filters, wicks, electrical areas, seals, and treated surfaces may have specific care requirements.
Use only the cleaning method and product allowed for that model. A household suggestion that works for one humidifier can damage another. Vinegar, bleach, dish soap, baking soda, and other cleaners are not interchangeable, and they should never be mixed. Mixing cleaning products can create hazardous fumes. If the manual does not clearly address the visible growth or odor, pause and contact the manufacturer before experimenting.
When should you discard or replace a part?
Replace a filter, wick, cartridge, seal, or other component only when the manufacturer identifies it as replaceable, non-cleanable, or damaged. A disposable part that holds odor after the approved cleaning process may need replacement, but do not infer that from appearance alone. Follow the model’s replacement instructions and use the correct part. If a hard-to-clean component is cracked, warped, or deteriorating, do not put it back into service just to avoid replacing it.
Rinse, dry, and reassess before use
After cleaning, rinse parts exactly as directed so no cleaning residue remains. Let washable components air-dry completely before reassembly. Keep water away from electrical controls, cords, plugs, and motor housings. Do not operate the humidifier while any part is wet unless the manual specifically describes that procedure. Once dry, inspect the unit again for remaining odor, slime, or visible growth. If the problem persists, stop and contact the manufacturer or a qualified appliance professional rather than escalating to stronger chemicals.
Cleaning the surrounding room can help with ordinary dust and grime, but it does not replace appliance-specific care. If the humidifier issue is part of a larger household cleanup, Clear Choice can help with a general house cleaning service. The company does not repair or sanitize humidifiers, so keep the appliance decision with the manufacturer or an appropriately qualified professional. These precautions support safer cleaning, but they are not a promise to prevent illness or treat a health condition.
How Often Should You Clean a Humidifier?
A humidifier needs a small amount of attention each day it runs, plus deeper cleaning based on the specific model and how heavily you use it. A unit that operates for many hours in a dry room may need closer monitoring than one used occasionally. Your owner’s manual should remain the final guide for cleaning products, removable parts, filters, and any maintenance interval.
For daily care, the Environmental Protection Agency recommends emptying the tank, wiping the tank and other accessible surfaces dry, and refilling with fresh water. Follow the EPA’s guidance for using and caring for home humidifiers alongside your model instructions. This routine reduces the time that water and residue sit inside the appliance.
Build a deeper-cleaning routine around use
Set aside time for a more thorough cleaning as often as the manual directs. Adjusting your attention when the humidifier runs frequently or you notice visible scale, residue, odor, or restricted output. Do not assume that a universal weekly or monthly schedule applies to every design. Some models have different materials, chambers, wicks, cartridges, or cleaning steps.
When deeper cleaning is due, unplug the unit, empty it, and follow the manufacturer’s approved method for each removable part. Rinse away any approved cleaning solution as directed, then let components dry completely before reassembling. Never operate the humidifier while electrical parts are wet. If a part cannot be cleaned according to the manual, is damaged. Or continues to smell after the recommended process, stop using the unit and contact the manufacturer for guidance.
Check the filter without guessing
Inspect the filter at the interval listed in the manual, and look for discoloration, mineral buildup, damage, or reduced airflow. Clean or replace it only when the manufacturer says that the filter is washable or replaceable. A filter that is intended for replacement should not be treated with an unapproved cleaner. While a washable filter still needs to dry as directed before it goes back into the unit.
A simple calendar reminder can help you track daily emptying and periodic inspection without turning maintenance into guesswork. For broader buildup and overlooked household areas, our deep cleaning for overlooked areas guide can help you plan the rest of your home while you keep the humidifier’s care model-specific.
What Mistakes Make a Humidifier Dirtier?
Even a careful cleaning can fall short when moisture, residue, or the wrong product remains inside the unit. Avoiding these common mistakes helps keep routine maintenance practical and protects the humidifier from unnecessary wear.
Leaving water in the tank
Standing water can leave behind mineral residue and create a damp environment inside the tank. Empty the reservoir as directed after use, wipe accessible surfaces, and allow parts to dry before the next refill. Do not top off old water with fresh water. Start with an empty tank instead.
Skipping the drying step
Rinsing is not the final step. Reassembling the humidifier while the tank, tray, or removable pieces are still wet can trap moisture in areas that are difficult to inspect. Dry each part completely, and never operate an electrical component while it is wet. Keep water away from controls, cords, plugs, and any housing that the manual identifies as non-washable.
Using an unapproved cleaner
Vinegar, baking soda, dish soap, bleach, and other household products are not interchangeable for every model. Use only the cleaning method and concentration allowed by the manufacturer. Never combine cleaning products, even if one is used for buildup and another is intended for odor. If the manual does not support a product, choose a documented alternative or contact the manufacturer before proceeding.
The same principle applies to surrounding surfaces. When a humidifier sits near a counter or sink, follow a separate step-by-step kitchen cleaning routine rather than letting cleaner enter the appliance.
Ignoring filters, parts, and humidity levels
A filter that is overdue for cleaning or replacement can reduce the value of the rest of your maintenance. Inspect it according to the model manual, and replace or clean it only as instructed. Also check seals, trays, and other removable pieces for damage. Do not force a part back into place or use the unit if a component is cracked or cannot be cleaned as directed.
Finally, avoid excessive indoor humidity. The U.S. Environmental Protection Agency advises not exceeding 50 percent indoor relative humidity. Use a simple humidity gauge if needed, adjust the humidifier setting, and follow the EPA guidance in its use and care guide for home humidifiers. These precautions are not a substitute for the model manual, but they can help prevent maintenance mistakes from becoming a recurring problem.
Request a cleaning quote from Clear Choice Home Cleaning Services
Frequently Asked Questions
Can you clean a humidifier with vinegar?
Only if the owner’s manual permits vinegar for your model. Vinegar can help loosen mineral buildup, but materials and coatings differ between humidifiers. Unplug the unit, use the manual’s recommended amount and contact time, rinse thoroughly, and let every part dry before reassembly. Never mix vinegar with bleach or another cleaner.
How do you clean a humidifier with mold?
Stop using the humidifier and follow the manufacturer’s cleaning instructions for the affected parts. Do not mix chemicals or improvise a stronger solution. If mold or odor remains after the approved cleaning process, or if a part cannot be cleaned completely, contact the manufacturer about replacement parts or further guidance.
How do you clean a humidifier filter?
Check the manual before washing, soaking, or replacing the filter. Some filters are washable, while others are disposable or require a specific care method. Do not reinstall a filter that is damaged, heavily soiled, or still wet. Replace it only on the schedule or under the conditions specified for your model.
Can you clean a humidifier with dish soap?
Use dish soap only when the manufacturer allows it for the specific removable part. Apply a small amount as directed, rinse until no residue remains, and keep soap away from electrical components. If the manual does not address dish soap, choose the manufacturer’s stated cleaning method instead of guessing.
Can you clean a humidifier with bleach?
Do not use bleach unless the manual specifically approves it and gives instructions for dilution, contact time, and rinsing. Never combine bleach with vinegar, ammonia, or another cleaner. When approved, work in a well-ventilated area, rinse exactly as directed, and allow the unit to dry fully before use.
Get started with broader cleaning support
Once your humidifier routine is covered, Clear Choice Home Cleaning Services can help with quote-based residential or commercial cleaning support across North Metro Atlanta. A professional cleaning plan may make it easier to keep the rest of your home or workspace orderly without adding another large task to your routine. To discuss your needs and request a quote, contact us through the form.